MiniIO Setup in Proxmox: Complete Installation & Deployment Guide
Introduction
If you’re looking for a scalable, S3-compatible object storage solution, this MiniIO Setup in Proxmox guide walks you through a production-ready deployment. Running MiniIO inside Proxmox VE ensures high availability, efficient storage allocation, and enterprise-grade virtualization. This tutorial covers VM creation, storage configuration, MiniIO installation, and security hardening.
Setting up your own object storage system is no longer reserved for large enterprises. With MinIO, organizations and developers can deploy high-performance, S3-compatible object storage on-premises or in the cloud. If you’re looking to setup MinIO server, this comprehensive guide walks you through:
- Installing MinIO on Linux, Windows, and macOS
- Deploying MinIO using Docker
- Configuring distributed clusters
- Securing access with TLS and IAM
- Optimizing performance
- Scaling for production
Whether you’re a DevOps engineer, backend developer, or infrastructure architect, this tutorial is structured for beginners to advanced users.
What is MinIO?
MinIO is a high-performance, open-source object storage server compatible with the Amazon S3 API. It is written in Go and designed for cloud-native workloads.
It is commonly used for:
- Backup systems
- Data lakes
- Machine learning storage
- Media storage platforms
- Kubernetes-native storage
Why Choose MinIO?
| Feature | Description |
|---|---|
| S3 Compatible | Works with AWS SDKs |
| Lightweight | Single binary deployment |
| High Performance | Designed for cloud-native workloads |
| Scalable | Distributed clustering support |
| Secure | Encryption, IAM, TLS |
History & Background
MinIO was introduced in 2014 as a lightweight alternative to traditional object storage systems. Unlike monolithic storage platforms, MinIO focuses on:
- Cloud-native architecture
- Simplicity in deployment
- Kubernetes-first design
It competes with:
- Amazon S3
- Ceph
- OpenStack Swift
MinIO is widely adopted for AI/ML workloads due to its high throughput and low latency.
Why Deploy MiniIO in Proxmox?
MiniIO is a high-performance object storage server compatible with Amazon S3 APIs. Deploying it on Proxmox VE offers:
- Virtualized isolation
- ZFS-backed storage
- Snapshot & backup support
- HA cluster capability
- Resource control (CPU, RAM, Disk)
Official references:
- MiniIO Documentation → https://min.io/docs/minio/linux/index.html
- Proxmox Wiki → https://pve.proxmox.com/wiki/Main_Page
Prerequisites
Before starting the MiniIO Setup in Proxmox, ensure:
- Proxmox VE installed
- Minimum 4GB RAM (8GB recommended)
- Dedicated storage disk or ZFS pool
- Static IP address
- Root or sudo access
Step-by-Step: Setup MinIO Server (Linux)
Step 1: Create a Virtual Machine in Proxmox
- Log in to Proxmox Web UI
- Click Create VM
- Configure:
- OS: Ubuntu Server 22.04 LTS
- CPU: 2 Cores (minimum)
- RAM: 4GB+
- Disk: 50GB+ (or attach separate storage disk)
- Network: VirtIO (Bridge vmbr0)
Start and install Ubuntu.
Step 2: Update the System
sudo apt update && sudo apt upgrade -yStep 3: Install MiniIO Server
Download MiniIO binary:
wget https://dl.min.io/server/minio/release/linux-amd64/minio
chmod +x minio
sudo mv minio /usr/local/bin/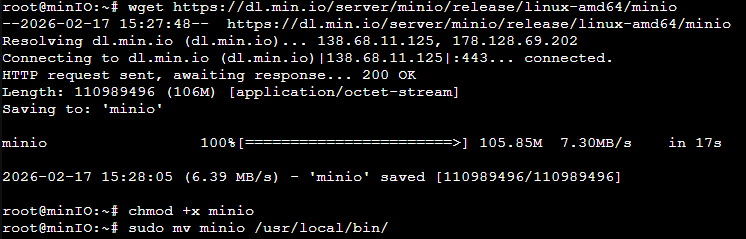
Verify installation:
minio --version

Step 4: Create Storage Directory
sudo mkdir -p /data/minio
sudo chown -R $USER:$USER /data/minioFor production, mount a dedicated disk:
lsblk
sudo mkfs.ext4 /dev/sdb
sudo mount /dev/sdb /data/minioStep 5: Configure MiniIO Environment
Create service user:
sudo useradd -r minio-user -s /sbin/nologinCreate config file:
sudo nano /etc/default/minio
sudo mkdir /etc/minioChange the ownership of these directories to the MinIO user.
sudo chown -R minio-user:minio-user /usr/local/share/minio
sudo chown -R minio-user:minio-user /etc/minioAdd:
MINIO_VOLUMES="/usr/local/share/minio/"
MINIO_OPTS="--address :9000"
MINIO_ACCESS_KEY="YOUR_ACCESS_KEY"
MINIO_SECRET_KEY="YOUR_SECRET_KEY"Step 6: Create Systemd Service
sudo nano /etc/systemd/system/minio.serviceAdd:
[Unit]
Description=MinIO
After=network.target

[Service]
User=minio-user
Group=minio-user
EnvironmentFile=/etc/default/minio
ExecStart=/usr/local/bin/minio server $MINIO_VOLUMES $MINIO_OPTS
Restart=always

[Install]
WantedBy=multi-user.targetReload and start:
sudo systemctl daemon-reload
sudo systemctl enable minio
sudo systemctl start minioStep 7: Access MiniIO Console
Open:
http://SERVER-IP:9001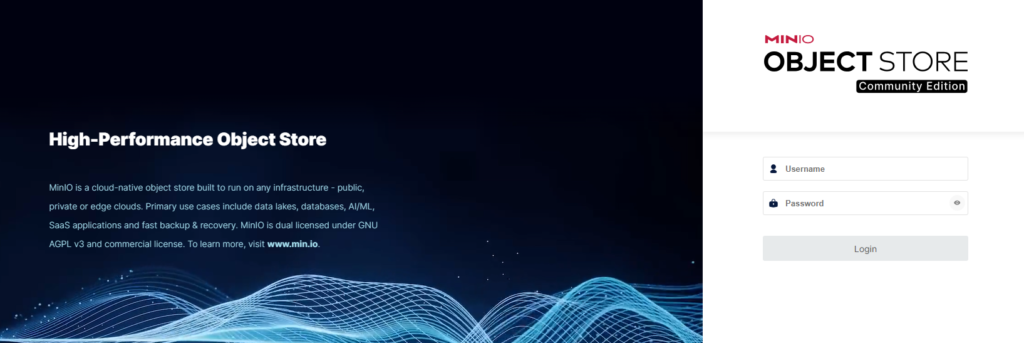
Login using root credentials.
Step 8: Firewall Configuration (Optional but Recommended)
sudo ufw allow 9000
sudo ufw allow 9001
sudo ufw enablePerformance Optimization Tips
- Use ZFS with compression enabled
- Allocate dedicated disk
- Use SSD/NVMe for metadata
- Enable Proxmox backups
- Configure distributed mode for clustering
Security Best Practices
- Use strong root credentials
- Enable TLS
- Restrict public access
- Use IAM policies
- Regular snapshot backups in Proxmox
Scaling MiniIO in Proxmox Cluster
For enterprise environments:
- Deploy multiple MiniIO nodes
- Use Proxmox HA cluster
- Configure distributed object storage
- Implement load balancing
Conclusion
This MiniIO Setup in Proxmox guide provides a complete installation and deployment workflow for running scalable object storage in a virtualized environment. By combining Proxmox VE virtualization with MiniIO’s S3-compatible storage engine, you achieve high availability, performance, and infrastructure flexibility.